
Bicycle Sheds & Bicycle Storage Buildings Charlotte NC
February 3, 2026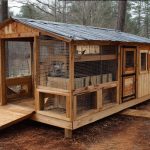
Chicken Coop Sheds & Barns Charlotte NC
February 17, 2026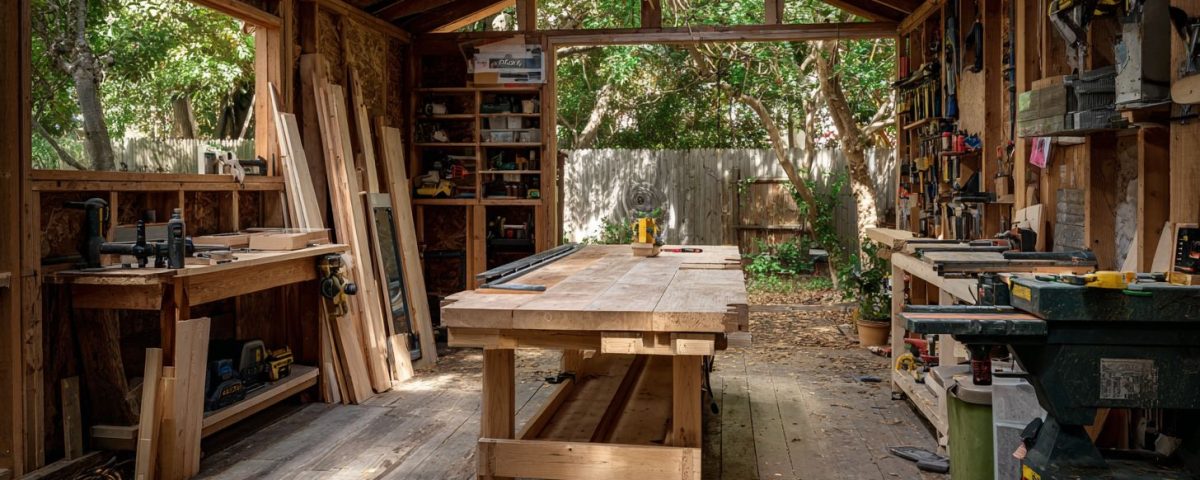
Imagine transforming scattered tools and half-finished projects into a dedicated haven for woodworking mastery. A well-crafted carpentry shed unlocks endless creativity, boosting efficiency and protecting your investments.
This guide covers planning your ideal space, essential design features like workbench layouts, materials selection, site preparation, foundation options from concrete to gravel, and step-by-step construction. Discover how to build yours today.
Planning Your Carpentry Shed
Start with a 10×12 carpentry shed or 12×16 shed layout using free plans or our shed builder tool, ensuring compliance with local zoning laws requiring 5-10ft setbacks from property lines. Proper planning turns a simple backyard structure into a functional woodworking shed that supports all your shed carpentry projects. Begin by evaluating space for essential power tools like table saws and miter saw stations, while factoring in lumber storage and dust collection systems. This step prevents overcrowding and improves workflow in your carpentry workshop. Experienced builders recommend allocating at least 20% of floor space for assembly areas to handle projects from furniture making to garden benches.
Follow these numbered planning steps to build your carpentry shed efficiently. First, assess your needs with a detailed tools list including table saw, miter saw, and drill press. Second, check zoning and permit requirements, noting HOA rules and the 200 sq ft threshold per IRC R105.1, or local exemptions. Third, sketch the layout using SketchUp Free or our shed builder tool, featuring an 8ft workbench and 4×8 lumber rack. Fourth, calculate your budget at $3,000-$5,000 for a 10×12 shed.
Consider a real example: a 12×16 shed costing $4,200 built in Charlotte and included extra space for a planer stand and jointer area. This Charlotte workshop shed featured double doors for workbench access, pegboard organization for chisels and clamps storage, and ventilation fans for sawdust control. Such planning ensures your backyard carpentry shed handles everything from scroll saw setups to finishing areas with varnish stations, while meeting safety standards for ear protection and dust masks storage. Budget for electrical outlets and lighting fixtures to support evening work on cabinetry projects or toy box builds.
| Essential Tools | Space Needed | Storage Idea |
|---|---|---|
| Table saw | 6x8ft | Roll-out base |
| Miter saw station | 4x6ft | Wall-mounted |
| Drill press workbench | 3x4ft | Vise mounted |
Essential Carpentry Shed Design Features
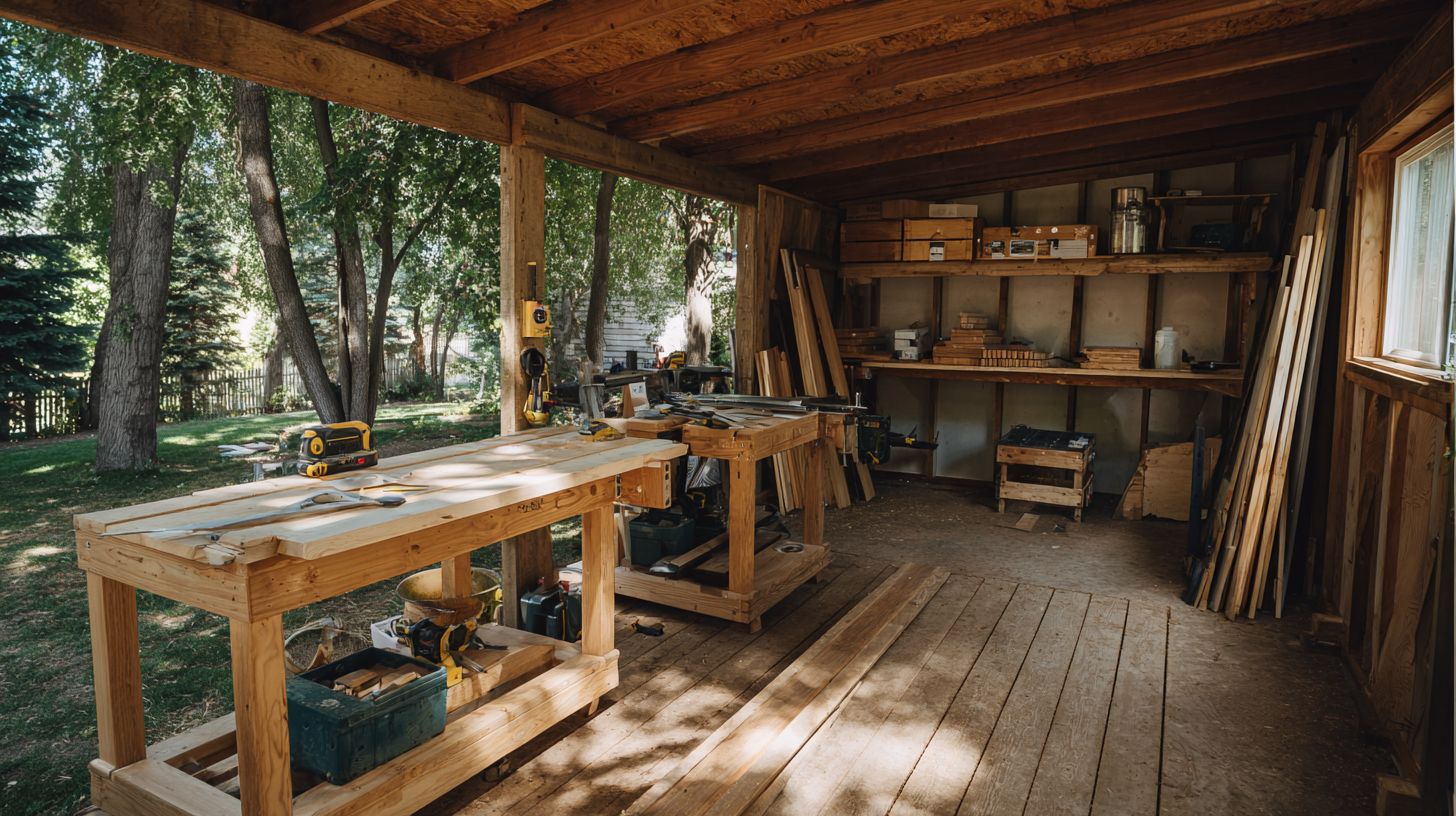
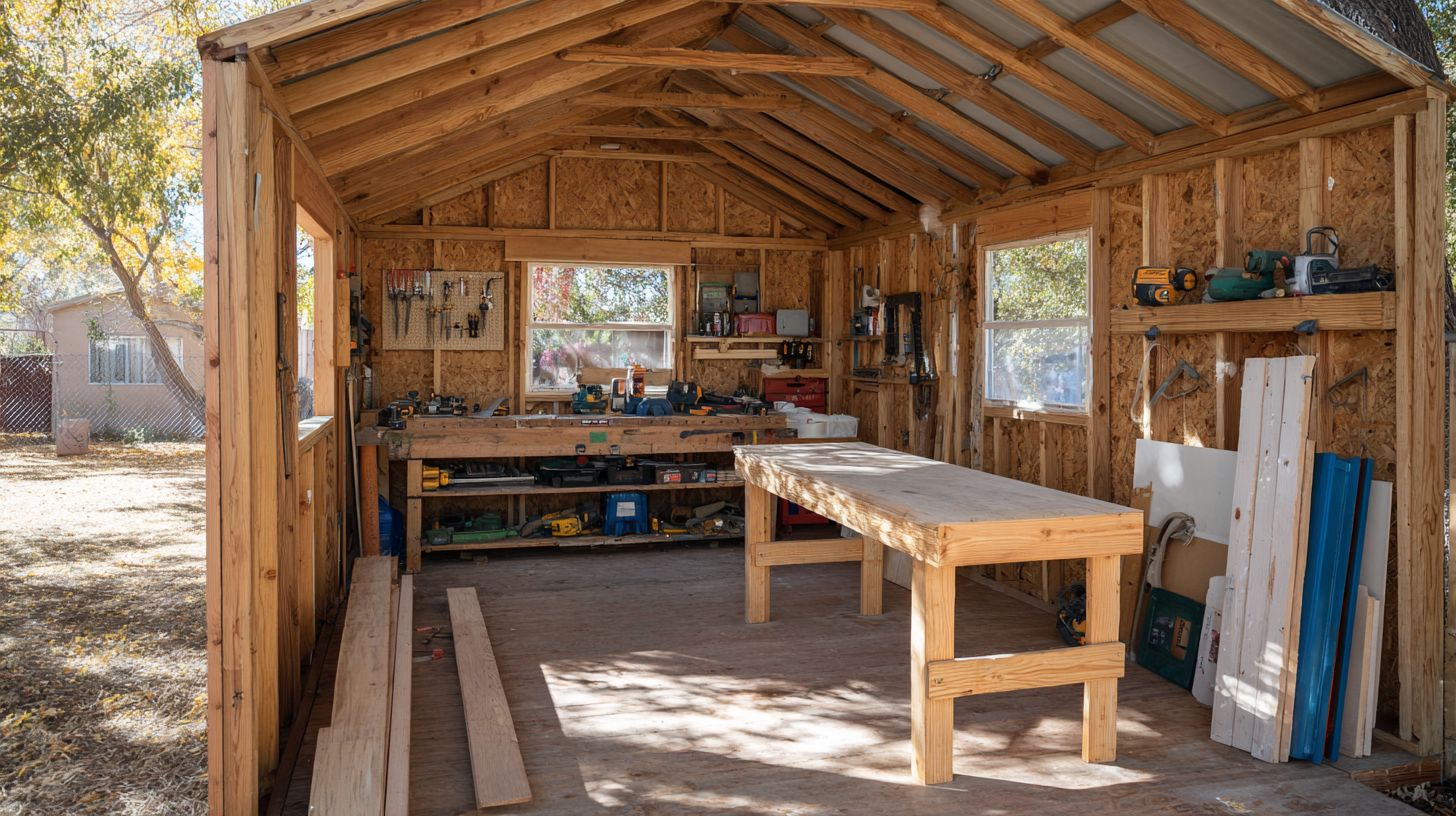
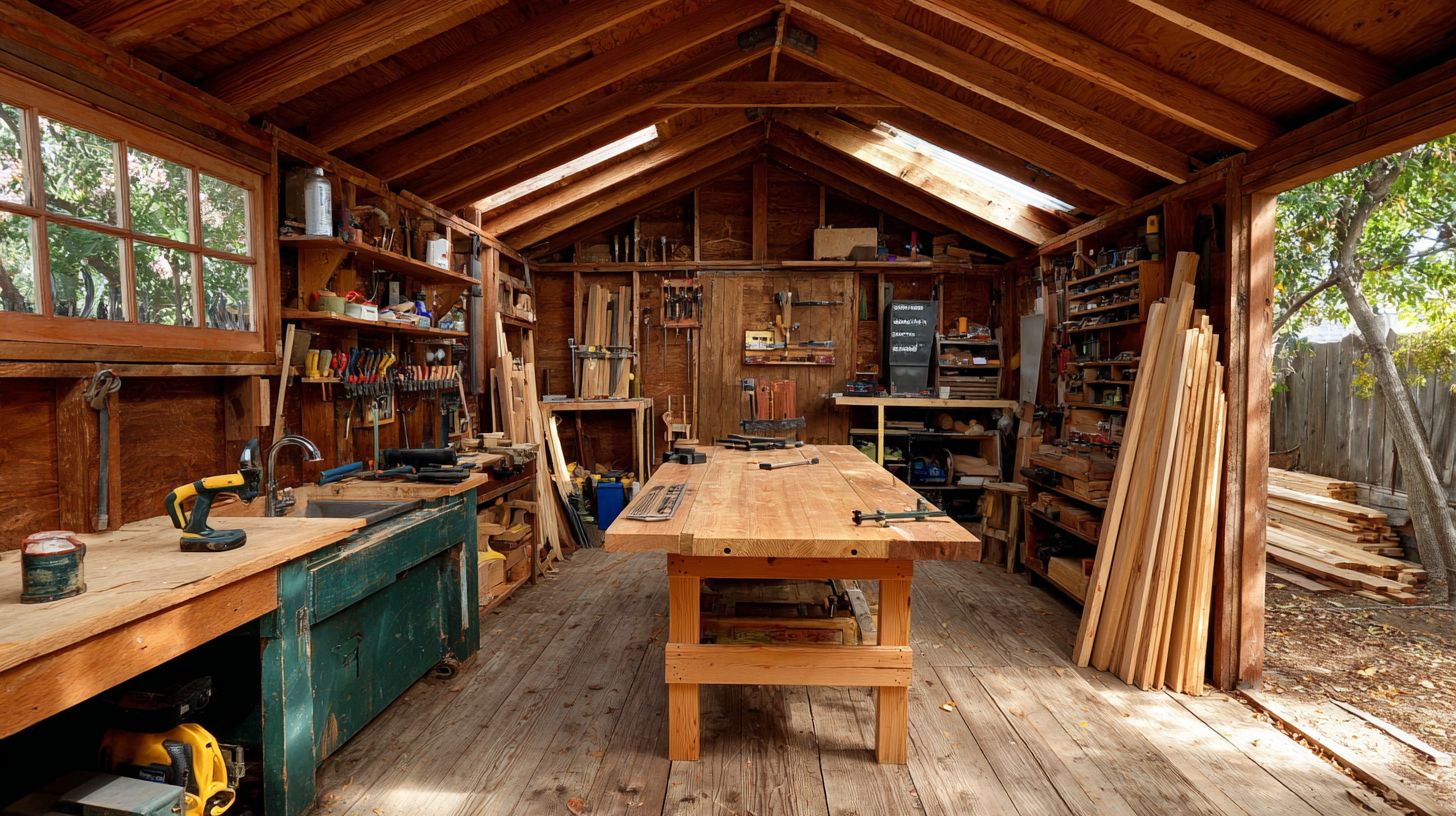
Optimal carpentry sheds incorporate dedicated zones for 8x3ft minimum workbench, tool storage via pegboard walls, and dust collection systems like the Dust Deputy cyclone. These workshop sheds follow zoning layout principles to maximize efficiency in a backyard carpentry shed. Separate areas prevent clutter, improve workflow, and boost safety during shed carpentry projects. For instance, position the main bench near double doors for easy lumber access, while placing power tools away from finishing zones to avoid dust contamination. This setup supports everything from furniture making to cabinetry projects in a custom carpentry shed.
Effective zoning in a woodworking shed starts with clear pathways at least 36in wide between stations. Integrate lumber storage racks opposite the workbench to keep materials handy yet organized. Add overhead lighting fixtures and multiple electrical outlets for power tools like table saws and drill presses. Ventilation fans and dust masks storage ensure a healthy carpentry workspace. Many carpentry shed builders report 20% faster project completion with zoned designs, as seen in popular carpentry shed plans.
Consider shed size like 10x12ft or 12x16ft for ample space in a garden carpentry shed. Include safety gear zones with ear protection and gloves near entrances. Weatherproofing with foam board insulation protects tools in an outdoor carpentry shed. Gravel base or concrete slab foundations provide stability for heavy equipment in a carpentry tool shed.
Workbench and Storage Layout
Design workbench at 36-38in height using 2×4 framing with 3/4in plywood top, mounting Record 52HD vise on corner and pegboard panels (4×8 sheets, $22 each) for 200+ tools. In carpentry sheds, Zone 1 features the main 96x36in bench with 24in vises and 6 outlets for seamless power tool use. This sturdy workbench anchors shed carpentry projects, from cutting boards on a miter saw station to assembly spaces for picnic tables.
Zone 2 handles vertical lumber racks that hold 20-2x4s, keeping plywood racks and board storage off the floor to save space in a woodshop shed. Zone 3 includes mobile tool cabinets for chisels rack, clamps storage, and sanders shelf. Reference Wood Magazine’s ‘Ultimate Shop Layout’ shows 15% productivity gain from optimized flow in a carpentry workshop. Pegboard organization on an 8x8ft tool wall displays measuring tools, levels, and squares for quick access during furniture making shed tasks.
| Component | Dimensions |
|---|---|
| Workbench | 96x36in |
| Tool wall | 8x8ft pegboard |
| Lumber rack | 4x10ft |
This layout suits a backyard carpentry shed, with jigs fixtures shed areas and wood scraps bin nearby. Double doors and shed windows enhance workbench access, while electrical outlets carpentry setup powers router table shed and planer stand efficiently.
Materials Selection
Use pressure-treated 4×4 skids ($18 each), 2×6 PT floor joists ($12/linear ft), T1-11 plywood siding ($45/sheet), and 29-gauge metal roofing ($2.50/sqft) for 25+ year durability in your carpentry shed. These choices meet IRC R317.1.1 requirements for ground contact wood, ensuring protection against decay and termites. Home Depot and Lowes 2024 pricing shows pressure-treated lumber as the most cost-effective option at around $0.80 per board foot, ideal for carpentry sheds where budget matters. Select materials based on your local climate, as wet areas demand extra treatment while dry regions allow cedar accents for aesthetics.
For a 10×12 shed BOM, plan these essentials: foundation with 16 PT 4×6 skids, floor using 20 sheets 3/4-inch plywood, walls framed with 12 sheets T1-11 siding, and roof covered by 15 metal panels. This setup supports heavy woodworking tools like table saws and lumber racks in a backyard carpentry shed. Compare options carefully, as PVC trim resists moisture better than wood but costs more. Factor in waste allowance of 10% for cuts and defects during construction of your shed for carpentry projects.
| Material | Cost | Pros | Cons |
|---|---|---|---|
| Pressure Treated Lumber | $0.80/bf | Affordable, IRC compliant for ground contact | Requires sealing, heavier weight |
| Cedar | $2.50/bf | Naturally rot-resistant, attractive grain | Higher cost, needs maintenance |
| PVC Trim | $3.50/ft | Maintenance-free, insect-proof | Less traditional look, expensive |
Choosing the right shed framing lumber balances cost and longevity for a carpentry workshop. Pressure-treated options dominate for skids and joists due to their strength under load from power tools and workbenches. Add gravel base beneath skids for drainage, preventing rot as per code. T1-11 siding at $45 per sheet from big box stores provides a plywood exterior that’s easy to paint and weatherproof. Metal roofing sheds water quickly, perfect for an outdoor carpentry shed exposed to rain. Always verify stock at Home Depot or Lowes for 2024 prices, as they fluctuate seasonally. This material strategy ensures your woodshop shed withstands years of sawdust, glue, and finishing projects.
Site Preparation
Clear 12x14ft area removing 4-6in topsoil, level with 2% slope (1/4in per ft) using 4ft transit level, and install landscape fabric ($0.20/sqft) to prevent weed growth when building your backyard carpentry shed. This initial step sets the foundation for a stable carpentry workshop that handles heavy woodworking tools like table saws and planers without shifting. Proper site prep avoids common issues in shed carpentry projects, ensuring your carpentry shed lasts through seasons of furniture making and cabinetry work. Start by marking the outline with spray paint for precision, then remove organic material to reach stable subsoil.
Follow these numbered steps for thorough shed foundation preparation, aligned with USD A soil compaction standards that recommend 95% relative compaction for load-bearing bases. First, mark a 12×14 rectangle with spray paint ($5). Second, excavate 6in using rented mini-excavator ($250/day). Third, compact subgrade with plate compactor ($75 rental). Fourth, add 4in gravel base (3/4in crushed stone, 3 tons = $420). Fifth, check level with less than 1/4in variance over 10ft using a long straightedge and level. This process creates a solid gravel base shed perfect for a woodshop shed with lumber storage and workbench access.
Avoid the common mistake of poor drainage, which causes 30% of rot failures according to Fine Homebuilding study, by incorporating that 2% slope away from your carpentry shed designs. Test drainage by pouring water around the perimeter after gravel placement; it should flow off quickly. For carpentry tool shed setups, add extra gravel depth near double doors for easy cart access with plywood racks and power tools. Compact in layers to meet standards, preventing settling that could crack your shed framing lumber or misalign a miter saw station. This prep supports long-term use in outdoor carpentry shed projects like birdhouse builds or deck repairs, keeping your space dry and functional.
Foundation Options
Choose between $800 concrete slab, $400 gravel base, or $250 concrete pier blocks based on frost line depth (36in minimum per IRC R403.1.4) and budget constraints for your carpentry shed. Concrete slabs offer the highest durability and level surface ideal for heavy woodworking tools like table saws and planers in a workshop shed, but they demand higher upfront costs and longer setup time. Gravel bases provide excellent drainage to protect against moisture in a backyard carpentry shed, making them cost-effective for shed carpentry projects with lighter use, though they may settle over time. Concrete pier blocks strike a balance for DIY carpentry sheds, elevating the structure above ground to meet frost requirements while keeping expenses low, perfect for a portable carpentry shed or seasonal outdoor carpentry shed. Consider local soil conditions and the weight of your lumber storage shed setup when deciding.
For a 10×12 carpentry workshop, a concrete slab ensures stability for power tools shed equipment such as miter saw stations and drill press workbenches, resisting shifts from freeze-thaw cycles common in northern climates. Gravel works well in well-drained areas for a carpentry hobby shed, allowing quick assembly so you can start shed for woodwork projects immediately. Pier blocks suit sloped sites for a carpentry garage alternative, using 8-12 blocks spaced evenly under floor joists. Always check zoning laws and permit requirements for your carpentry workspace to avoid issues. Costs vary by region, but balancing durability with budget helps create a long-lasting base for tool organization shed features like pegboard walls and lumber racks.
Expert tip: Test soil compaction before choosing a shed foundation for your woodshop shed. Poor drainage can lead to rot in carpentry tool shed floors, so pair gravel with landscape fabric. For heavy-duty carpentry bench shed use, invest in concrete to support vises and assembly spaces without cracking under load.
Concrete vs Gravel Bases
Concrete slab (4in thick, 3,500 PSI mix) costs $0.80/sqft materials + $4/sqft labor versus gravel base at $0.25/sqft materials + minimal labor for a carpentry shed. The concrete slab uses a 1:2:3 cement:sand:gravel mix reinforced with a 10×10 #4 rebar grid, poured to create a smooth, permanent surface perfect for workbench shed installations in a shed with workbench. It requires a 4-week cure time before loading with woodworking tools, but delivers unmatched stability for table saw shed and jointer setups. Gravel bases, compacted in 4-6in layers with a plate compactor, offer instant usability and superior drainage to prevent moisture damage in insulated carpentry shed floors, ideal for DIY carpentry shed builders on a budget.
| Feature | Concrete Slab | Gravel Base |
|---|---|---|
| Cost for 10×12 shed | $800 total | $400 total |
| Surface | Level, permanent | Drainage friendly |
| Setup time | 4-week cure | Instant use |
| Long-term | No settling | Settles 1/4in/year |
| Best for | Heavy power tools shed | Light carpentry storage shed |
A case study from the This Old House shed build series shows a 15-year concrete slab holding firm under constant use in a carpentry workshop, while an 8-year gravel base developed settling issues requiring re-leveling. For project shed carpentry, concrete suits high-traffic finishing area shed with paint booths, as it resists dents from dropped tools. Gravel excels in rainy areas for a garden carpentry shed, paired with plywood racks and dust collection systems. Actionable tip: For concrete, excavate 6in deep, add 2in gravel base first, then form and pour. Gravel needs 3/4in crushed stone topped with 1/4in fines for stability in your woodshop shed.
Construction Steps
Follow this 18-step sequence starting with floor framing (2×6 PT joists 16in OC) using Simpson Strong-Tie A23 joist hangers ($1.50 each), completing in 2-3 weekends with two people. Building a carpentry shed or workshop shed requires precise cuts and secure connections to support heavy woodworking tools like table saws and lumber storage. Begin by marking and cutting 16 joists at 9’6″ using a Festool TS55 saw for clean edges that fit your shed carpentry projects. Lay out the floor frame on a flat gravel base, securing joists with galvanized nails and the A23 hangers every 16 inches on center. This foundation handles the weight of a sturdy workbench and power tools in your backyard carpentry shed.
Next, install PT 4×6 skids with 90mil EPDM flashing under the frame to elevate and protect against moisture, essential for a dust collection shed environment. Sheath the floor with 3/4″ plywood and construction adhesive for a solid base that resists warping from wood glue spills or finishing work. Time estimates show the floor assembly takes about 8 hours, allowing space for a miter saw station or drill press workbench. Use a circular saw, speed square, and powder-actuated nails from your tool organization shed setup to speed up progress on this DIY carpentry shed.
Wall framing follows with 2×4 studs at 16in OC and let-in bracing for stability in your carpentry workspace. Raise walls using a come-along winch ($35), then build roof trusses in a 2×4 gable design. Install metal roofing with butyl tape seals and T1-11 siding with LP SmartSide edges sealed for a maintenance free shed. Walls take 12 hours, and always reference OSHA 1926.501 for fall protection on roofs over 6ft. This sequence creates a custom carpentry shed ready for cabinetry projects or furniture making.
Tools and Materials List
Essential tools for constructing your woodshop shed include a circular saw, speed square, Festool TS55, come-along winch, and powder-actuated nail gun to handle tasks like framing and sheathing efficiently. Materials feature 2×6 PT joists, Simpson Strong-Tie A23 hangers, PT 4×6 skids, 3/4″ plywood, 2×4 lumber, T1-11 siding, and metal roofing panels. Budget for 16 joists and hangers at $1.50 each to support a shed with workbench and pegboard organization. These items ensure your carpentry tool shed withstands outdoor conditions while providing space for hand tools carpentry and safety gear like dust masks.
Stock up on construction adhesive, butyl tape, 90mil EPDM flashing, and galvanized fasteners for weatherproofing your outdoor carpentry shed. A powder-actuated tool secures skids quickly, ideal for a concrete slab workshop alternative. Include levels, squares, and measuring tools for accurate shed framing lumber cuts. This list supports building a 10×12 or 12×16 workshop shed, perfect for scroll saw setups or jointer space.
Safety Checklist
Prioritize safety in your carpentry hobby shed build by following OSHA 1926.501 for fall protection on roofs higher than 6ft, using harnesses and guardrails during truss installation. Wear gloves carpentry, ear protection, and dust masks when cutting plywood siding shed materials. Check for stable ladders and secure scaffolding before raising walls with the come-along winch in your project shed carpentry.
Inspect power tools like the circular saw for guards and cords, and keep a first aid kit with eye wash near your finishing area shed. Ground all electrical outlets carpentry to prevent shocks during lighting fixtures shed setup. Secure lumber storage shed racks to avoid tip-overs, and ventilate for sawdust control. This checklist minimizes risks in a portable carpentry shed or insulated version, ensuring safe shed for woodwork.
Professional Carpentry Sheds in Charlotte From Barnyard Utility Buildings
Hire the professionals at Barnyard Utility Buildings to bring your Charlotte carpentry shed vision to life. We handle the entire design / build process from start to finish and provide financing options like rent to own with no credit check. If you want your Charlotte home’s carpentry shed built right with the entire process handled from start to finish, get in touch with us today.
Frequently Asked Questions
What are carpentry sheds?
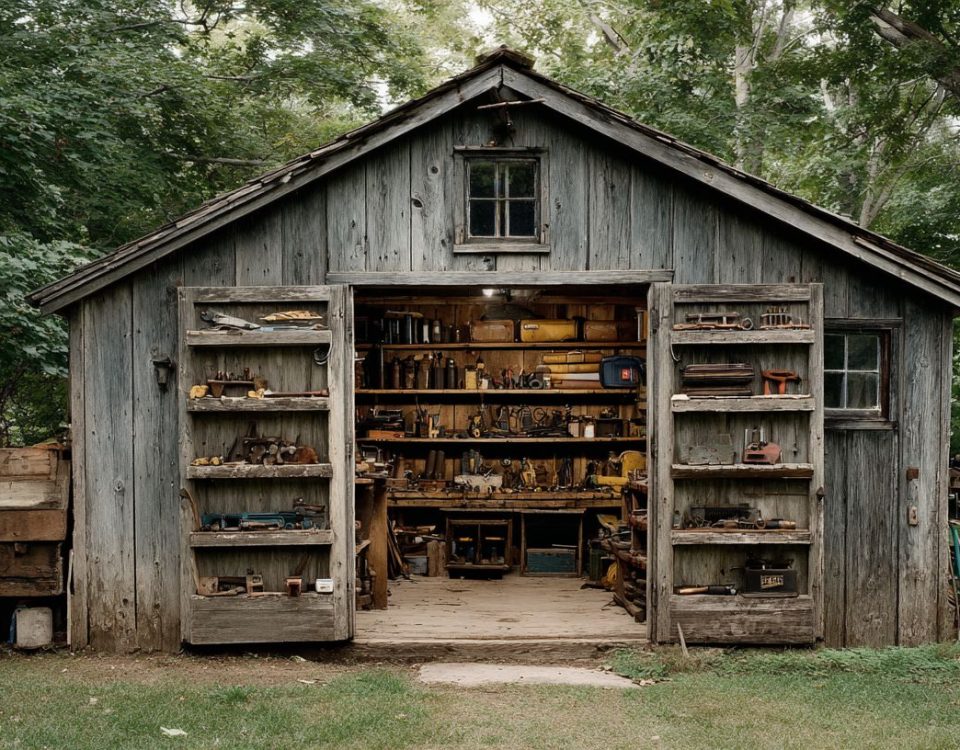
Carpentry sheds – sheds for carpentry projects are specialized outdoor structures designed specifically for woodworking and carpentry enthusiasts. These sheds provide a dedicated workspace with features like ample shelving, workbench areas, good ventilation, and protection from weather elements, making them ideal for storing tools and tackling various carpentry projects without cluttering your home garage.
Why choose carpentry sheds over a regular garden shed?
Unlike regular garden sheds, carpentry sheds – sheds for carpentry projects are built with durability in mind to handle sawdust, heavy tools, and moisture from wood. They often include reinforced flooring, electrical outlets, brighter lighting, and customizable interiors tailored for saws, lathes, and assembly work, ensuring a safer and more efficient environment for your carpentry projects.
How do I build my own carpentry shed?
Building carpentry sheds starts with selecting a flat site, solid foundation like concrete piers, and weather-resistant materials such as treated timber or metal siding. Incorporate large doors for easy access, skylights for natural light, and pegboards for tool organization. Professional shed builders emphasize insulation and ventilation to control dust and humidity. Get in touch with us to learn more.
What size should carpentry shedsbe for most home users?
For most home users, carpentry sheds – sheds for carpentry projects around 10×12 feet to 12×16 feet strike the perfect balance, offering enough room for a workbench, tool storage, and project space without overwhelming your yard. Smaller 8×10 options suit beginners, while larger ones accommodate bigger machinery-always check local zoning laws for maximum dimensions on carpentry sheds – sheds for carpentry projects.
Are carpentry shedsinsulated and suitable for year-round use?
Yes, many carpentry sheds – sheds for carpentry projects come with insulation options like foam panels or fiberglass to maintain comfortable temperatures year-round. Proper sealing, double-glazed windows, and heating/cooling vents make them viable for all seasons, protecting your tools and wood from extreme weather while keeping your carpentry projects on track regardless of the forecast.
What essential features should carpentry sheds have?
Essential features for carpentry sheds – sheds for carpentry projects include sturdy workbenches, dust collection systems, ample electrical circuits for power tools, pegboard walls for hanging gear, and sloped roofs for rain runoff. Good airflow via vents or fans prevents mold, and secure locks protect valuable equipment, turning these sheds into productive hubs for all your carpentry projects.

